
 Docs
 Xenovia SDK
 API
Before you start
- You need to be an admin of your Xenovia organization.
- On GitHub, you need to be able to install a GitHub App on the account that owns the repositories.
- One GitHub installation per Xenovia organization. To switch to another installation, disconnect the current one first.
Connect GitHub
1
Start
In first-run setup, choose Find agents in your code, then Install on GitHub. Or open Settings › Integrations, find GitHub under Code, choose Connect, then Continue to GitHub.
2
Install the app
On GitHub, pick the account and choose the repositories Xenovia may read: all of them, or a selection. GitHub then asks you to authorize Xenovia, which lets Xenovia confirm that you can see the installation.
3
Back in Xenovia
GitHub sends you back to the GitHub integration page. Xenovia lists the repositories and starts scanning them.
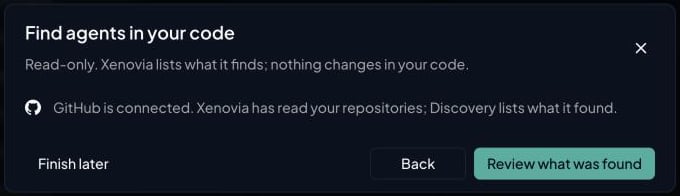
Find agents in your code, once GitHub is connected
What Xenovia reads, and when
The integration page lists your repositories under Repositories, with each one’s visibility, default branch and when it was last scanned. Turn Scan off for a repository to leave it out. A repository is scanned when you connect GitHub; on every push to its default branch, at the pushed commit; when you choose Sync now on the integration page, which also lists the repositories again; and when you choose Scan now in Discovery. Pushes to other branches don’t start a scan. Archived repositories aren’t scanned. A scan reads dependency manifests and configuration files first, then the source files most likely to hold an agent. It reads up to 200 files per repository, each up to 256 KB. It skips vendored, generated and test directories, and never reads lock files. When a scan hits its limits, the entry’s Scan coverage says Truncated. Scans and setups use AI credits; while your organization has none left, they don’t run.What a scan reports
Each agent, LLM integration, MCP server and MCP client the scan finds is an entry. Its findings include:
An agent found in code has its own page with two tabs: Overview (what it is, its source, owner, framework, provider and model, the tools seen in its code, and the linked Xenovia agent) and Set up in Xenovia.
From code to a governed agent
After each scan, Xenovia reads the code of every agent whose code changed and writes a setup for it. If an agent has none yet, an admin can choose Plan the setup. The Set up in Xenovia tab shows what Xenovia will create: the agent and its model provider, a purpose and capabilities, policies, guardrails, alert rules, hosted tools and MCP servers, the agents it calls, backup models, and Neon protections. Each part says which findings it answers. Findings that only a code change can fix are listed under Fix in your code.1
Apply the setup
Choose Create agent, or Apply when the entry is already linked to a Xenovia agent. Xenovia creates everything in the setup in the plan’s mode, shown on each part. The mode is monitor unless the plan says otherwise: Xenovia records what it would block, without blocking. Something a person already changed on the agent is kept. The agent goes live once it has an API key; if it has none yet, create one on the agent’s page and apply again.
2
Route the agent through Xenovia
Nothing changes for the running agent until its code calls Xenovia. Point its base URL at the endpoint shown under Linked agent on the Overview tab. See Connect your app.
3
Confirm and tighten
Push the change. Once the scan of that push sees the code calling Xenovia, the Not governed by Xenovia finding is resolved. Watch the agent in Sessions, then switch its checks and policies to enforce when you’re ready.
Changes you make on GitHub
Disconnect
Choose Disconnect on the GitHub integration page. Xenovia forgets the installation and stops scanning. What only GitHub reported leaves Discovery, and its open findings are resolved. Reviews and the Xenovia agents linked to discovered code stay. The app stays installed on GitHub until you uninstall it there. If you connect the same installation again, Xenovia takes its repositories back and scans them again.Troubleshooting
Messages when connecting fails
Messages when connecting fails
After connecting
After connecting
What next?

Connect your app
Route a found agent through Xenovia.

More sources
Add identity and device integrations.

Simulation
Test a copy of an agent built from its code.