
 Docs
 Xenovia SDK
 API
1. Create your account
1
Sign up
On Create your account, enter your email and a password and choose Create account, or use Sign up with Google. Enter the code from Verify your email and choose Verify email.
2
Choose an organization
On Choose an organization, open an organization you belong to, join one under Pending invitations, or enter an Organization name and choose Create organization.
2. Pick where to start
The first time an admin opens the console, the Welcome dialog asks Where do you want to start? Pick one and choose Continue: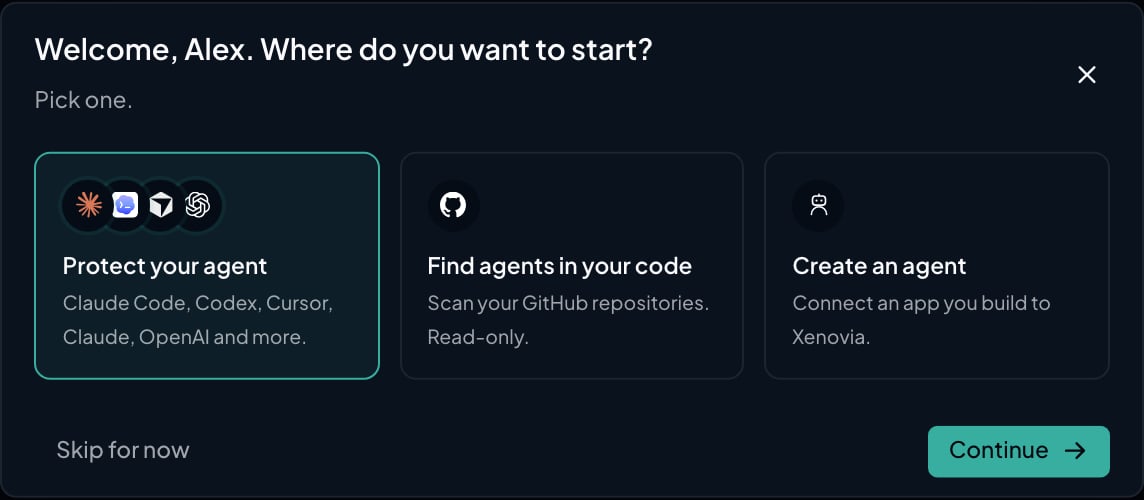
The Welcome dialog
Skip for now closes the dialog. When Nova is on for your deployment, Set it up with Nova starts a Nova conversation that asks which coding agents your team uses and whether your code is on GitHub, then does the steps with you.
Nothing is blocked until you say so: everything you set up starts in Monitor.
3. Create an agent for your app
If you picked Create an agent:1
Add a provider
The agent sends its model requests to a provider. On Providers, add one with a model and its credential. See Providers.
2
Purpose
Give the agent a Name and a Purpose: what it is for. Every model request is checked against the purpose.
3
Model route
Choose its Provider, and optionally Fallbacks.
4
Protection
Add Policies and guardrails, or leave it empty for now, and choose Create agent.
5
Connect your app
On the agent’s page, Setup shows three steps: Change the base URL to the Xenovia URL, Add authentication (create an API key; it is shown once), and Send a test request. Then choose Activate.
4. Finish the checklist
Get started, at the bottom of the sidebar, ticks itself off from what’s in your organization: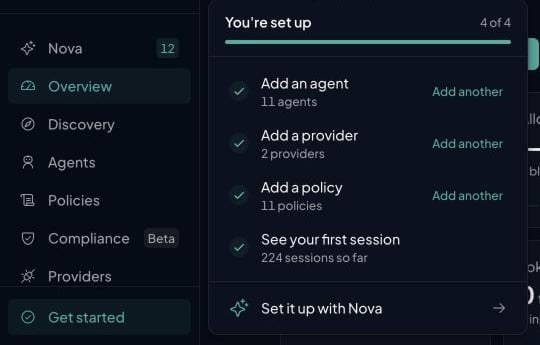
The Get started checklist, all four steps done
What next?

How it works
Agents, checks, policies, Neon and sessions in a page.

Add a policy
Block one thing your agent should never do.

Find agents
See what else your organization uses.